|
Free lander rear skid custom
페이지 정보작성자 육혁 작성일05-01-22 01:08 조회3,449회 댓글0건 |
본문
Rear Bumper Skid Plate Design, Fabrication and Installation
After dropping off of several river cut banks, sliding over rocks as rear wheels dropped into holes and slogging through deep mud, it became very apparent that the rear bumper on my Hippo was becoming quite scathed. The front lower edge is covered with little dings, a couple minor cracks are starting to form and the lower surface is quite abraded. Time to do something about it.
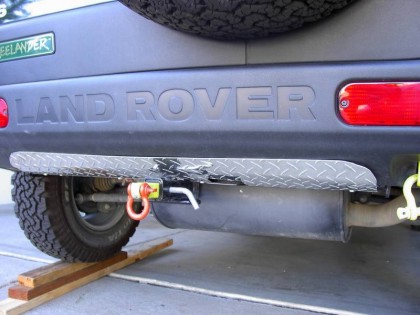
The lower edge of the OEM drawbar is almost exactly at the same plane as the bottom of the bumper. The hitch receiver is welded to the bottom of the drawbar, peeking out about ¼ inch below the bumper. Also, the bracket for the trailer wiring harness plug is also welded horizontally below the drawbar. I decided that an aluminum diamond plate skid could be made to curve down the back of the bumper and with the proper notches could fit above the receiver and attach to the bottom of the drawbar.
I bought a sheet of .063 inch thick aluminum diamond plate. I measured and fabricated a cardboard template (mockup) of the finished skid. Tucked it into position and it fit perfectly. I decided on using 2 ½ inch long ¼-20 bolts, nuts and lock washers for fasteners. These along with some pieces of punched steel plates I could fasten the skid to the drawbar.

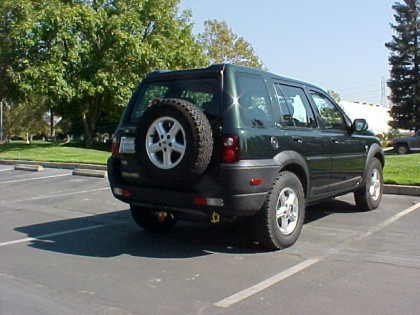
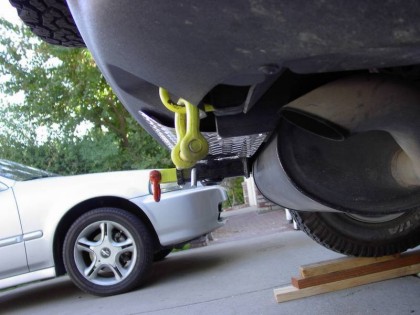
사진1 Photo BUMPERSKID1 is of “Me Beauty”. The lighting was such that the skid is just barely visible. In good lighting though, It looks a bit like the fake plastic skid on the ’04 Hippo.

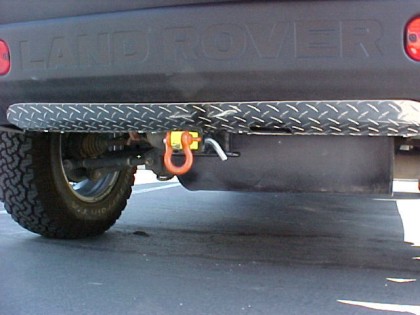
사진2 Photo BUMPERSKID2 is a close up of the skid installed. You will notice that the hitch receiver appears to just float below the skid plate. The square black object to the right is the wiring harness bracket peeking through its hole – I haven’t

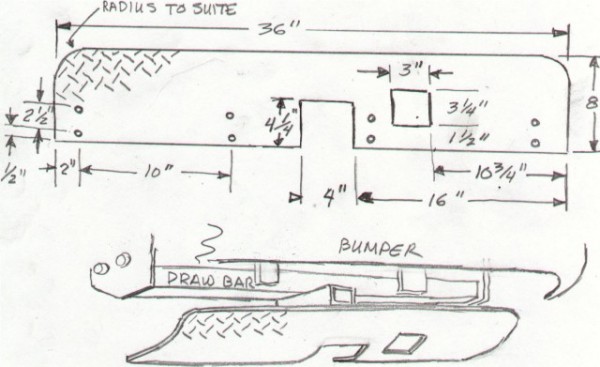
사진3 Finally, BUMPERSKID3 is a sketch of the dimensions of the skid made for fitting to the OEM drawbar. I’m quite sure that the outside dimensions would fit almost any drawbar that bolts into the provided frame mounting brackets on the Hippo. Class-III

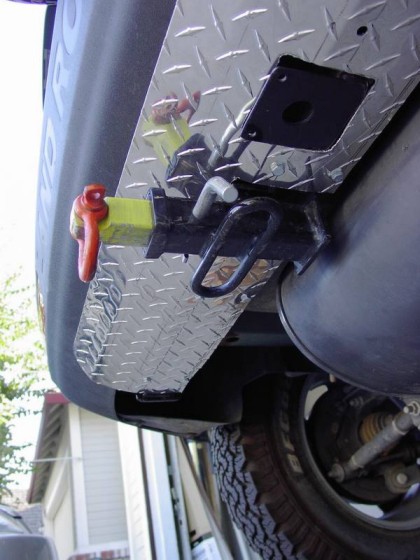
사진4 I bored 8 - 5/16-inch diameter holes as clearance for the ¼-20 x 2 1/2 bolts. I used some 1-inch wide by 1/16 inch steel strapping that was already bored with 3/8 holes. I cut 4 pieces of that to use as the brackets on top of the drawbar. Locations

사진5

사진6

