|
로버 swaybar
페이지 정보작성자 육혁 작성일04-12-22 02:41 조회2,999회 댓글1건 |
본문
4.0/4.6
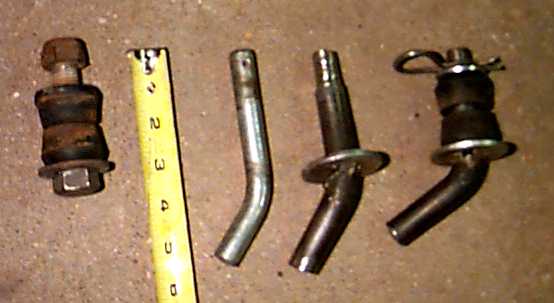
1. The sway bar disconnect are manufactured by TeraFlex and are intended for use on a Jeep CJ. They measure 4.5” center to center and have a slight off set.
2. The kit come with two pegs that the disconnects will mount to. The top mount is a stud mount system. The hole on the frame will need to be bored out a slight bit to fit the new stud in the frame location. Using a tapered drill bit is the easiest way to do this. The stud is then mounted using a nylon ” fine thread lock nut (not included in the kit). I suggest using this in lieu of the included nut and lock washer.
3.The lower mount to the actual sway bar will also need to be bored out. The lower link is a threaded stud and you will need a grade 8 fine thread bolt 3” long to mount the stud. Apply red lock tight to the thread before you tighten the bolt.
4. The disconnects can now be greased and slid into place. The angle portion should point toward the outside of the vehicle.
Classic Range Rover Sway Bar Disconnects
Ashfaq Ali made his own disconnects for the front and rear sway bars on his Classic Range Rover. He used hitch receiver pins with two washers to replace the bolts that are currently used for the sway bar bushings. He kindly supplied fabrication instructions and a photograph.
Materials
The following parts are needed for each disconnect (four disconnects are needed to disable front and rear sway bars and get them out of the way).
(1) 6" x 3/4" round stock bend as shown
(1) 3/4" large washer, tack weld to the pin
(1) 5/8" large washer
(1) Hitch pin retainer clip
Procedure
Purchase a 24" long x 3/4" round rod at a metal store and cut it up into 6" pieces. Simply bend the 6" rods like a hitch pin using heat from a torch and tach weld a 3/4" washer as shown. The eyes in the sway bars are 5/8" diameter so I had to grind the rod down to go in the hole. (If you have a lathe you can turn the end down before bending the rod). Drill a small hole for the hitch pin clips and voila!!!
Note: One can also use normal hitch pins for this, but there would be a little of bit of play due to the smaller diameter. The only trouble I"m running into is drilling 1/16" holes in the pins for the clips!!! I don"t have a vise for my drill press!!
Results
Ali reports that attaching/detaching the front swaybar on the passenger side requires a little patience. The remaining connections are easy however

사진1 The sway bar disconnect are manufactured by TeraFlex and are intended for use on a Jeep CJ. They measure 4.5” center to center and have a slight off set 4.0/4.6

사진2 clasic quick disconnect

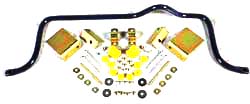
사진3 front classic sway bar kit

사진4 rear classic sway bar kit


